
When the unexpected happens and your incubator stops working, it’s crucial to act quickly to protect your eggs. This guide will provide you with essential steps and solutions to address this challenge effectively. Understanding what to do if incubator stops working can save your hatching project from disaster.

1. Assess the Situation Immediately
The first step is to determine whether the issue is temporary or requires more serious intervention. Often, power outages or minor malfunctions can cause your incubator to stop working. Check if theres a simple fix, such as resetting the power source or adjusting the settings.
1.1 Check Power Supply
Ensure that the incubator is properly plugged in and that the outlet is functioning. Sometimes, a tripped circuit breaker might be the problem. Consider using a backup power source, like a generator, to keep the incubator running during power outages.
1.2 Inspect for Physical Damage
Look for any visible signs of damage to the incubator, such as broken parts or exposed wires. Physical damage might require professional repair or replacement.
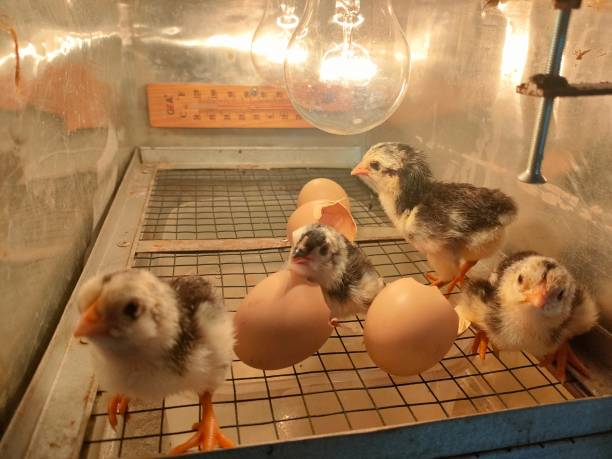
2. Maintain Optimal Temperature Manually
If the incubator is not working properly, maintaining the right temperature manually is crucial. Use household items like hot water bottles or heating pads to keep the eggs warm. Its essential to monitor the temperature closely to prevent overheating or underheating.
2.1 Use Alternative Heat Sources
Consider using lamps or other heat sources as a temporary measure. Ensure these are safe and do not overheat the eggs. Placing a thermometer inside can help you monitor the temperature accurately.
3. Adjust Humidity Levels
Humidity is just as important as temperature for egg incubation. If your incubator stops working, you can maintain humidity by placing a damp sponge or cloth inside. This will help prevent the eggs from drying out.
3.1 Monitor Humidity with a Hygrometer
Using a hygrometer can help you keep track of the humidity levels inside the incubator. Adjust as necessary to maintain the ideal environment for hatching.
4. Seek Professional Repair Services
If you’re unable to fix the incubator yourself, it may be time to seek professional help. Look for repair services that specialize in incubators or contact the manufacturer for assistance.
4.1 Warranty and Repair Options
If your incubator is still under warranty, contact the manufacturer for repair or replacement options. This can save you from incurring additional costs.
5. Consider Portable Incubator Options
Having a portable incubator on hand can be a lifesaver in emergencies. These are especially useful for small batches of eggs and can serve as a temporary solution while your primary incubator is being repaired.
5.1 Benefits of Portable Incubators
Portable incubators are easy to use and can quickly take over when your main incubator stops working. They are often battery-operated, making them ideal during power outages.
6. Learn from the Experience
Every challenge is an opportunity to learn. Reflect on what went wrong and how you can prevent similar issues in the future. This might involve regular maintenance checks or investing in a more reliable incubator model.
6.1 Regular Maintenance Tips
Perform regular maintenance on your incubator to ensure it stays in good working condition. This can include cleaning the unit, checking for wear and tear, and ensuring all parts are functioning properly.
7. Stay Calm and Patient
It can be stressful when an incubator stops working, but staying calm will help you think clearly and act effectively. Remember that eggs can survive without perfect conditions for short periods.
7.1 Practice Patience
Patience is key in these situations. Take the time to implement solutions carefully and monitor the eggs closely until the incubator is fully operational again.
8. Utilize Online Resources and Communities
There are many online resources and communities where you can seek advice and support. Websites like Chicken Things and More and forums can be invaluable when troubleshooting incubator issues.
8.1 Connect with Other Enthusiasts
Joining a community of fellow chicken enthusiasts can provide you with tips and tricks for managing incubator problems. Its a great way to learn from others experiences.
9. Explore Advanced Incubation Techniques
Consider exploring advanced incubation techniques that might offer more resilience against technical failures. These techniques can provide additional safety nets for your hatching projects.
9.1 Research and Experiment
Experiment with different incubation methods and technologies to find what works best for you. This can improve your success rate and prepare you for unforeseen challenges.
10. Prepare for the Future
Use this experience to better prepare for future hatching projects. Whether its investing in a backup incubator or learning new techniques, being prepared can save you time and stress.
10.1 Backup Plans
Always have a backup plan in place. This might include having extra equipment or a detailed action plan for different scenarios.
FAQ Section
What should I do first if my incubator stops working?
First, check the power supply and settings. Ensure that the incubator is plugged in and receiving power. If the problem persists, consider alternative heat sources and seek professional repair services if necessary.
How can I maintain humidity if the incubator fails?
Place a damp sponge or cloth inside the incubator to maintain humidity. Use a hygrometer to monitor the levels and adjust as needed.
Should I have a backup incubator?
Yes, having a backup incubator can be very helpful in emergencies. Portable incubators are especially useful for small batches of eggs and can serve as a temporary solution.
For more detailed guidance on incubator troubleshooting, visit Dalton Supplies for expert advice.
This article contains affiliate links. We may earn a commission at no extra cost to you.


