
As we reach day 21 of incubation, a significant and transformative event takes place in the life of a chicken egg. This moment is crucial for chicken lovers and breeders alike. Understanding what happens during this time can ensure a successful hatching process. It’s essential to know the intricacies involved, as it can make a significant difference in the outcome.
The Importance of Day 21
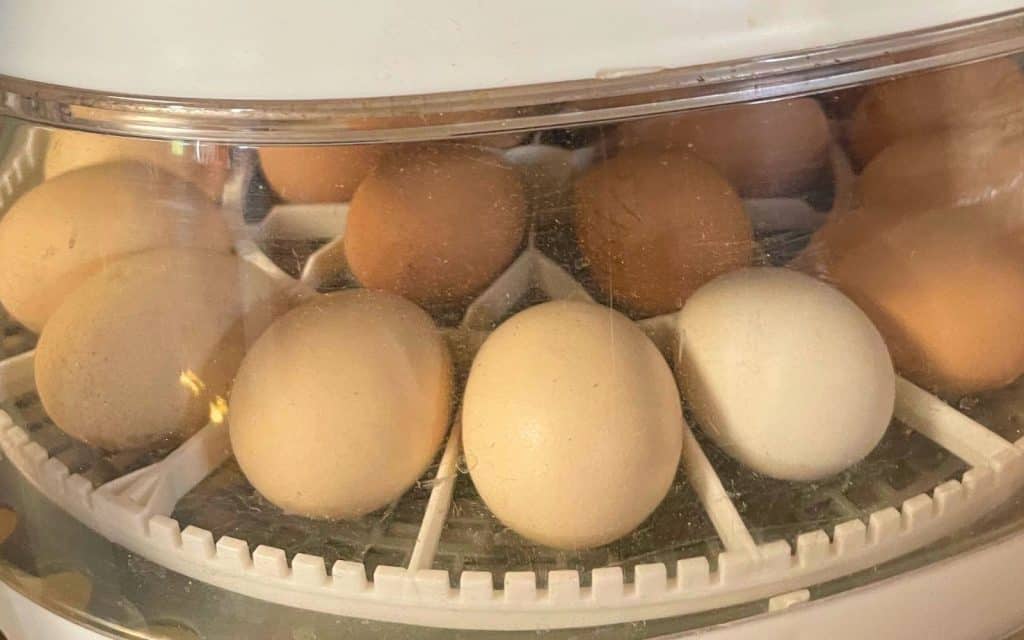
Day 21 marks the culmination of the incubation period, where all the efforts of maintaining the right conditions finally pay off. At this stage, the embryo inside the egg is fully developed and ready to hatch. The anticipation is palpable as you await the first signs of life breaking through the shell.
The Hatching Process Begins
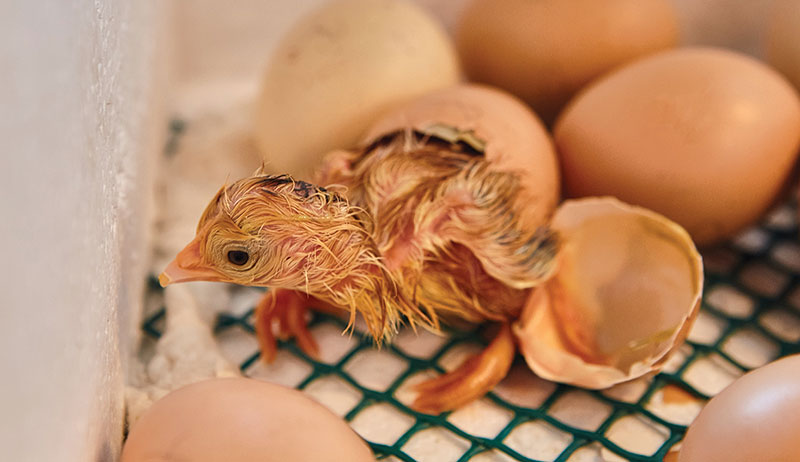
During this critical day, the chick starts to break through the egg, a process known as ‘pipping.’ Initially, the chick uses its egg tooth, a small, sharp projection on its beak, to crack the inner membrane. This is followed by breaking through the outer shell. The process can take several hours, as the chick rests between efforts to regain strength.
Environmental Conditions
Maintaining optimal environmental conditions during this time is vital. Ensure that the humidity levels are kept high, as this aids in softening the shell and makes it easier for the chick to break free. You can find useful humidity hacks to assist in maintaining these conditions.
Signs of Hatching
Look out for signs such as slight movements of the egg or faint peeping sounds, which indicate the chick’s progress. Patience is key, as the hatching process can take from a few hours to a full day.
Potential Challenges
Sometimes, chicks may face challenges during hatching, such as being unable to break the shell due to its thickness or insufficient humidity. In such cases, refer to this troubleshooting guide for solutions.
The Role of the Egg Tooth
The egg tooth is an essential tool for the chick during hatching. It’s a temporary structure that helps the chick break through the shell and is absorbed or falls off a few days after hatching.
Post-Hatching Care
Once the chick emerges, its crucial to provide adequate care. Allow the chick to dry off in the incubator before transferring it to a brooder. This step is vital for the chick to gain strength and warmth. Learn more about caring for newly hatched chicks from trusted sources.
Monitoring Health
After hatching, monitor the chick’s health closely. Ensure it is active and able to stand. Any signs of weakness or inability to stand might require intervention.
Common Issues After Hatching
Post-hatching issues can include leg problems or failure to thrive. It’s essential to address these promptly by consulting guides or veterinary advice.
Preparing for New Arrivals
As day 21 approaches, prepare the brooder with clean bedding, a heat source, and access to clean water and feed. This preparation ensures that the chicks have a comfortable environment to start their new lives.
Celebrating Success
Successful hatching is a rewarding experience. It’s the culmination of careful planning and execution of the incubation process. Celebrate your success and share your experiences with fellow chicken enthusiasts.
Learning from Experience
Each incubation cycle offers a learning opportunity. Reflect on what went well and what could be improved for future hatchings. Connect with other chicken lovers and share insights and tips.
Future Hatching Projects
With the knowledge gained, consider additional hatching projects for the future. Engaging in new projects can deepen your understanding and enhance your skills as a chicken breeder.
FAQ Section
Q1: How long does the hatching process take on day 21?
A1: The hatching process can take anywhere from a few hours to a full day as the chick works to break free from the egg.
Q2: What should I do if a chick is struggling to hatch?
A2: If a chick is struggling, ensure humidity levels are correct and consult troubleshooting guides for assistance.
Q3: How soon after hatching should a chick be moved to a brooder?
A3: Allow the chick to dry completely in the incubator before moving it to a brooder, which usually takes a few hours.
This article contains affiliate links. We may earn a commission at no extra cost to you.


