Creating a comfortable and efficient nesting environment is crucial for any chicken owner. One innovative and cost-effective solution is using milk crate nesting boxes. These versatile containers provide a perfect setting for hens and can be easily customized to fit your coop’s requirements. In this article, we’ll explore the benefits, setup process, and tips for using milk crate nesting boxes.

Why Choose Milk Crate Nesting Boxes?
Milk crate nesting boxes offer several advantages for chicken owners. They are affordable, easy to find, and can be customized to fit any coop size. Additionally, milk crates are durable and provide excellent ventilation, ensuring a comfortable environment for your hens.
Affordability and Accessibility
One of the main benefits of using milk crate nesting boxes is their affordability. Milk crates are often available for free or at a low cost, making them an excellent choice for budget-conscious chicken owners. You can often find them at local grocery stores, online marketplaces, or through friends and family.
Durability and Ventilation
Milk crates are made of sturdy plastic, which makes them durable and long-lasting. Their open design provides excellent ventilation, preventing moisture buildup and ensuring a healthy environment for your hens. This is particularly important in warmer climates, where proper ventilation is crucial for maintaining your chickens’ health.
How to Set Up Milk Crate Nesting Boxes
Setting up milk crate nesting boxes is a straightforward process that requires minimal tools and materials. Follow these simple steps to create a comfortable nesting environment for your hens.
Step 1: Gather Your Materials
To set up your milk crate nesting boxes, you’ll need the following materials:
- Milk crates
- Zip ties or bungee cords
- Bedding material (such as straw, hay, or wood shavings)
- Optional: plywood or other materials for creating a privacy barrier
Step 2: Prepare the Milk Crates
Start by cleaning your milk crates thoroughly to remove any dirt or debris. This will help prevent the spread of disease and ensure a healthy environment for your hens. Once your crates are clean, you can begin setting them up in your coop.
Step 3: Arrange and Secure the Crates
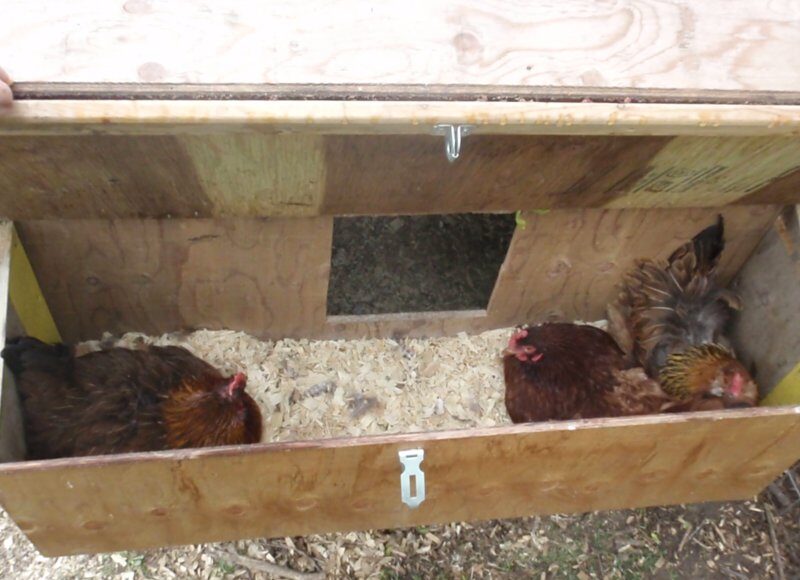
Place your milk crates in a quiet, dark area of your coop. This will encourage your hens to use them for laying eggs. You can stack the crates or arrange them side by side, depending on your available space and the number of chickens you have. Use zip ties or bungee cords to secure the crates in place and prevent them from tipping over.
Step 4: Add Bedding and Privacy
Line the bottom of each milk crate with bedding material, such as straw, hay, or wood shavings. This will provide a comfortable surface for your hens to lay their eggs. If desired, you can also create a privacy barrier using plywood or other materials to give your hens a sense of security while nesting.
Tips for Maintaining Milk Crate Nesting Boxes
To ensure your milk crate nesting boxes remain a comfortable and efficient solution for your hens, follow these maintenance tips:
Regular Cleaning
Keeping your milk crate nesting boxes clean is essential for maintaining a healthy environment for your chickens. Regularly remove soiled bedding and replace it with fresh material. This will help prevent the buildup of bacteria and ensure your hens have a clean, comfortable place to lay their eggs.
Monitor for Wear and Tear
While milk crates are durable, it’s essential to monitor them for signs of wear and tear. Over time, the plastic can become brittle or cracked, compromising the safety and comfort of your hens. Replace any damaged crates promptly to maintain a safe environment.
Adjust as Needed
As your flock grows or changes, you may need to adjust your milk crate nesting boxes setup. This could include adding more crates, rearranging their layout, or changing the bedding material. Be sure to monitor your hens’ behavior and make adjustments as needed to ensure their comfort and productivity.
Comparing Milk Crate Nesting Boxes to Other Options
While milk crate nesting boxes are an excellent choice for many chicken owners, it’s essential to consider other nesting options to determine the best solution for your flock. Some alternatives include:
- Traditional wooden nesting boxes
- Plastic nesting boxes
- Roll-out nesting boxes
- Community nesting boxes
Each option has its pros and cons, so it’s essential to evaluate your specific needs and resources when selecting the best nesting solution for your chickens.
Traditional Wooden Nesting Boxes
Wooden nesting boxes are a classic choice for chicken owners. They offer a warm, natural environment for hens and can be easily customized to fit your coop. However, they can be more expensive and require regular maintenance to prevent issues like rot and pest infestations.
Plastic Nesting Boxes
Plastic nesting boxes are similar to milk crate nesting boxes in terms of durability and ventilation. They are easy to clean and maintain, making them a popular choice for many chicken owners. However, they can be more expensive than milk crates, depending on the design and materials used.
Roll-out Nesting Boxes
Roll-out nesting boxes feature a sloped design that encourages eggs to roll away from the hen after being laid. This helps keep eggs clean and reduces the risk of breakage. While these boxes can be more expensive and complex to set up, they offer significant benefits in terms of egg cleanliness and collection efficiency. Learn more about roll-away nesting boxes.
Community Nesting Boxes
Community nesting boxes are large, shared spaces where multiple hens can lay their eggs. These boxes can be an efficient use of space, particularly for larger flocks. However, they may require more maintenance and cleaning due to the increased number of hens using the space. Discover more about community nesting box design.
Additional Resources for Chicken Owners
For those interested in learning more about chicken care and coop management, there are numerous resources available. Consider exploring the following topics:
Additionally, you can find helpful tips and tutorials on creating DIY nesting solutions, such as DIY bucket chicken nest boxes.
Conclusion
Milk crate nesting boxes offer a practical, cost-effective solution for chicken owners seeking a comfortable and efficient nesting environment for their hens. With their affordability, durability, and ease of setup, milk crates are an excellent choice for those looking to optimize their coop without breaking the bank. By following the tips and guidelines outlined in this article, you can ensure your hens have a safe and comfortable space to lay their eggs, ultimately contributing to a happier and healthier flock.

Frequently Asked Questions
Can I use milk crates for other poultry?
Yes, milk crates can be used for other poultry, such as ducks and quail. However, you may need to make adjustments to the setup and bedding material to accommodate the specific needs of each bird species.
How many milk crate nesting boxes do I need for my flock?
The general rule of thumb is to provide one nesting box for every 3-4 hens. However, this may vary depending on your flock’s size and behavior. Monitor your hens to determine if additional nesting boxes are needed.
Do I need to secure the milk crates to prevent tipping?
Yes, it’s essential to secure the milk crates using zip ties or bungee cords to prevent them from tipping over. This will ensure a stable and safe environment for your hens to lay their eggs.
This article contains affiliate links. We may earn a commission at no extra cost to you.


