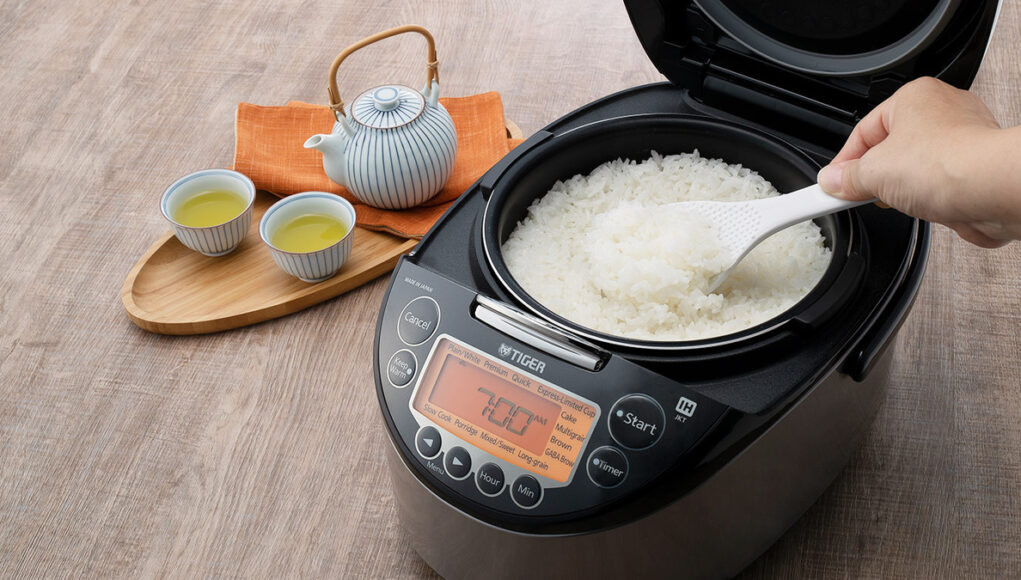
If you want a flavorful and vibrant side dish to pair with your favorite grilled or fried dishes, learning how to cook Java rice in a rice cooker will be a game-changer. Java rice, a popular Filipino yellow rice, is loaded with rich flavors from garlic, turmeric, and butter, giving it a distinct taste and color. The best part? You can easily prepare this delicious meal with a rice cooker, saving time and effort.

Why Java Rice is a Must-Try Dish
Java rice is popular in Filipino cuisine and is often served alongside barbecued meats such as pork BBQ, grilled chicken, or beef tapa. Unlike plain steamed rice, Java rice is infused with various aromatic seasonings, making every bite savory and delightful. The recipe is simple, requiring only a handful of ingredients, yet the outcome is a bowl of vibrant and flavorful rice.
By using a rice cooker, you streamline the cooking process while maintaining the traditional taste of Java rice. There’s no need to stand over the stove; your rice cooker handles most of the work.
Ingredients for Java Rice
- 2 cups of cooked white rice (Jasmine or long-grain preferred)
- 2 tablespoons butter or margarine
- 1 teaspoon turmeric powder for the yellow color
- 2 cloves garlic, minced
- 1/2 teaspoon paprika for a smoky flavor
- 1/4 teaspoon salt, or to taste
- 1/4 teaspoon black pepper
- 1 tablespoon soy sauce (optional, for added savoriness)
- 1 tablespoon annatto oil (optional, for enhanced color)
- 1 tablespoon oil
Step-by-Step Guide on Cooking Java Rice in a Rice Cooker
Step 1: Prepare the Rice
Start by washing the rice thoroughly to remove excess starch. Use a cutting board for preparing your garlic. If you’re using a rice cooker with a non-stick pot, avoid using metal utensils that might scratch the coating.
Step 2: Add Seasonings to the Rice Cooker
Once the rice is ready, add butter, turmeric powder, paprika, garlic, and soy sauce. These ingredients will boost flavor while also giving the rice its signature golden hue. Stir well to evenly distribute the spices.
Step 3: Cook the Java Rice
Switch your rice cooker to the Cook mode as you would when making regular steamed rice. Let the rice fully cook, absorbing all the flavors. Depending on your rice cooker model, this process may take approximately 20-25 minutes.
Step 4: Final Mixing
Once the rice is cooked, allow it to sit for about 5 minutes, then fluff it with a non-metal spoon to avoid scratching your rice cooker pot. At this point, you can drizzle annatto oil for extra color and visual appeal.
Step 5: Serve and Enjoy
Your flavorful Java rice is now ready! Serve it alongside grilled meats, fried chicken, or seafood for a delightful meal. If you love pairing your rice dishes with different foods, check out this quinoa recipe for another interesting side dish.
Tips for the Best Java Rice
- For a more vibrant yellow color, feel free to add annatto oil when serving.
- If you like a spicier kick, consider adding a pinch of cayenne pepper.
- Make sure your rice is not overly wet; slightly dry rice helps the seasonings absorb better.
- Java rice pairs excellently with claypot chicken rice.
Pairing Suggestions
Java rice pairs wonderfully with grilled meats and traditional Filipino dishes like Chicken Inasal and Barbecue Pork. If you’re a fan of flavored rice dishes, you may also enjoy this coconut milk rice recipe.
Cleaning Your Cookware After Cooking
After cooking, it’s crucial to maintain your cookware for longevity. Use a cookware cleaner to remove any residue from your rice cooker and always treat your cutting board oil to keep it in good shape.

Final Thoughts
Now that youve learned how to cook Java rice in a rice cooker, you can easily make this delicious and vibrant dish at home. Its an excellent alternative to plain white rice and will complement various meals with its aromatic and garlicky taste.
For more easy rice cooker recipes, visit this fried rice recipe for inspiration.
Enjoy your flavorful Java rice, and happy cooking!
This article contains affiliate links. We may earn a commission at no extra cost to you.


