Raising chicks can be a delightful experience, especially when you provide them with a cozy, safe environment from the start. If you’re wondering how to build a wooden chick brooder, you’re in the right place! Creating a brooder at home is not only rewarding but also ensures that your chicks have a comfortable space to grow.

Understanding the Basics of a Chick Brooder
Before diving into the building process, let’s first understand what a chick brooder is. Essentially, it’s a heated enclosure that keeps baby chicks warm and safe, mimicking the comfort of a mother’s presence. A well-constructed brooder is crucial for the healthy development of your chicks.
Gathering Materials and Tools
To build a sturdy wooden chick brooder, you’ll need the following materials and tools:
- Wooden boards (plywood works well)
- Nails or screws
- A saw (manual or electric)
- Hammer or screw gun
- Wire mesh
- Heat lamp
- Bedding material (such as straw or wood shavings)
- Paint or wood sealant (optional)
Ensure you have all the necessary items before starting your project.
Planning the Design and Size
When planning your brooder, consider the number of chicks you intend to raise. A larger space is always better as it allows the chicks to move freely. A good rule of thumb is to provide at least 0.5 to 1 square foot per chick. Draw out your design, including where you’ll place the heat lamp and access points for feeding and cleaning.
Choosing the Right Location
Place your brooder in a draft-free, safe area. It’s important that the location is easily accessible for maintenance and monitoring. Additionally, ensure the area is protected from predators.
Building the Base and Walls
Start by constructing the base of the brooder. Use your saw to cut the plywood into the desired size for the bottom of the brooder. Then, attach the wooden boards to form the walls, securing them with nails or screws. Make sure the walls are sturdy enough to withstand any playful chick activity.
Installing Wire Mesh
To ensure proper ventilation while keeping the chicks safe, install wire mesh on the top of the brooder. This will also prevent any predators from getting in.
Setting Up the Heating System
The heat lamp is a crucial component of your brooder. Position it in a way that it provides even warmth throughout the space. It’s essential to monitor the temperature, aiming for around 95F for the first week, gradually reducing it by 5F each week as the chicks grow.
Adding Bedding and Nesting Material
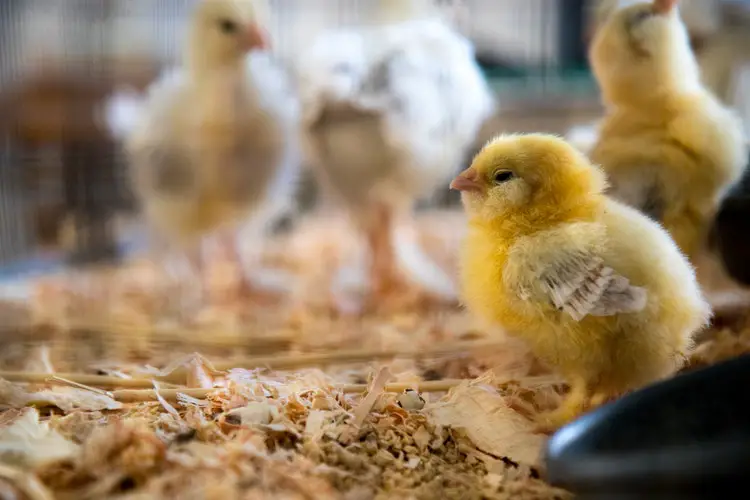
Line the floor of the brooder with bedding material. Straw or wood shavings are excellent options as they provide comfort and absorb waste effectively. Ensure the bedding is changed regularly to maintain a clean environment for the chicks.
Regular Maintenance and Cleaning
Keeping the brooder clean is vital for the health of your chicks. Establish a maintenance schedule to ensure timely cleaning and disinfecting. For detailed cleaning tips, check out our guide on how to clean a chick brooder.
Providing Food and Water
Ensure that food and water are easily accessible to all chicks within the brooder. Use shallow dishes to prevent drowning. Its important to keep the feed dry, and you can learn more about this from our tips on keeping feed dry in the brooder.
Monitoring Chick Health
Regularly check on your chicks for any signs of illness or distress. Early detection can prevent the spread of disease and ensure the well-being of your flock.
Gradual Transition to Outdoor Living
As your chicks grow, they will need to transition to outdoor living. Start by introducing them to the outside world for short periods, gradually increasing their time outside as they adapt.
Introducing Grit
Once your chicks start exploring the outdoors, it’s time to introduce grit to their diet. Grit helps in the digestion of food and is an essential part of their development.
Conclusion
Building a wooden chick brooder is a fulfilling project that ensures the safety and comfort of your baby chicks. By following this guide, you can create a secure environment that caters to their needs, allowing them to thrive. For more detailed chick care tips, visit external resources like PetMD’s chick care sheet.

FAQs
What is the ideal temperature for a chick brooder?
The ideal temperature starts at 95F in the first week and decreases by 5F weekly until it reaches ambient temperature.
How often should I clean the brooder?
It’s recommended to clean the brooder weekly and change the bedding regularly to maintain a healthy environment.
Can I use a cardboard box as a brooder?
While a cardboard box can be a temporary solution, a wooden brooder is more durable and provides better security for the chicks.
This article contains affiliate links. We may earn a commission at no extra cost to you.


