
Welcome to the exciting world of egg incubation! Whether you’re a seasoned farmer or a curious novice, understanding the basics of egg incubation is crucial to successfully hatching healthy chicks. This beginners guide to egg incubation will provide you with essential knowledge and insights to embark on this rewarding journey.

Understanding Egg Incubation
Egg incubation is the process of keeping fertilized eggs under controlled conditions to encourage embryo development and hatching. The process mimics the natural conditions a mother hen would provide. The goal is to create an environment with optimal temperature, humidity, and ventilation for the eggs to develop properly.
Why Incubate Eggs?
Many chicken enthusiasts choose to incubate eggs for several reasons. It allows you to control the hatching process, ensuring a higher success rate. Additionally, it provides the opportunity to hatch a variety of breeds, expanding your flock with specific traits you desire.
Choosing the Right Incubator
Selecting the appropriate incubator is a critical step in the egg incubation process. There are various types of incubators available, from simple models for small operations to advanced systems for larger-scale hatching. Consider factors such as capacity, ease of use, and features like automatic turning and digital controls.
Preparing Your Incubator
Before placing your eggs in the incubator, it’s essential to ensure it’s clean and properly set up. Clean the incubator to remove any dust or debris that could affect the eggs. Follow the manufacturer’s instructions for setting the temperature and humidity levels. For more tips on maintaining a clean environment, check out how to clean a chicken coop naturally.
Collecting and Selecting Eggs
Not all eggs are suitable for incubation. Choose eggs that are clean, well-formed, and of medium size. It’s advisable to gather eggs from healthy hens, as this increases the likelihood of successful hatching. Avoid using eggs with cracks or deformities, as these can hinder embryo development.
Setting the Eggs
Once your incubator is ready and you have selected your eggs, it’s time to set them. Place the eggs with the pointed end facing down and the larger end up. This positioning helps the embryo develop correctly and ensures successful hatching.
Monitoring Temperature and Humidity
Maintaining the right temperature and humidity levels is crucial. Most chicken eggs require a temperature of around 99.5F (37.5C) and a humidity level between 50-55% during incubation. Use a reliable thermometer and hygrometer to monitor these conditions regularly.
Turning the Eggs
In the wild, hens naturally turn their eggs. In an incubator, this process is replicated by turning the eggs manually or using an automatic turner. Turning the eggs prevents the embryo from sticking to the shell and promotes even development.
Lockdown Period
The last few days of incubation, known as the lockdown period, are critical. During this time, stop turning the eggs and increase the humidity slightly. This prepares the eggs for hatching and provides the moisture needed for chicks to break through the shell.
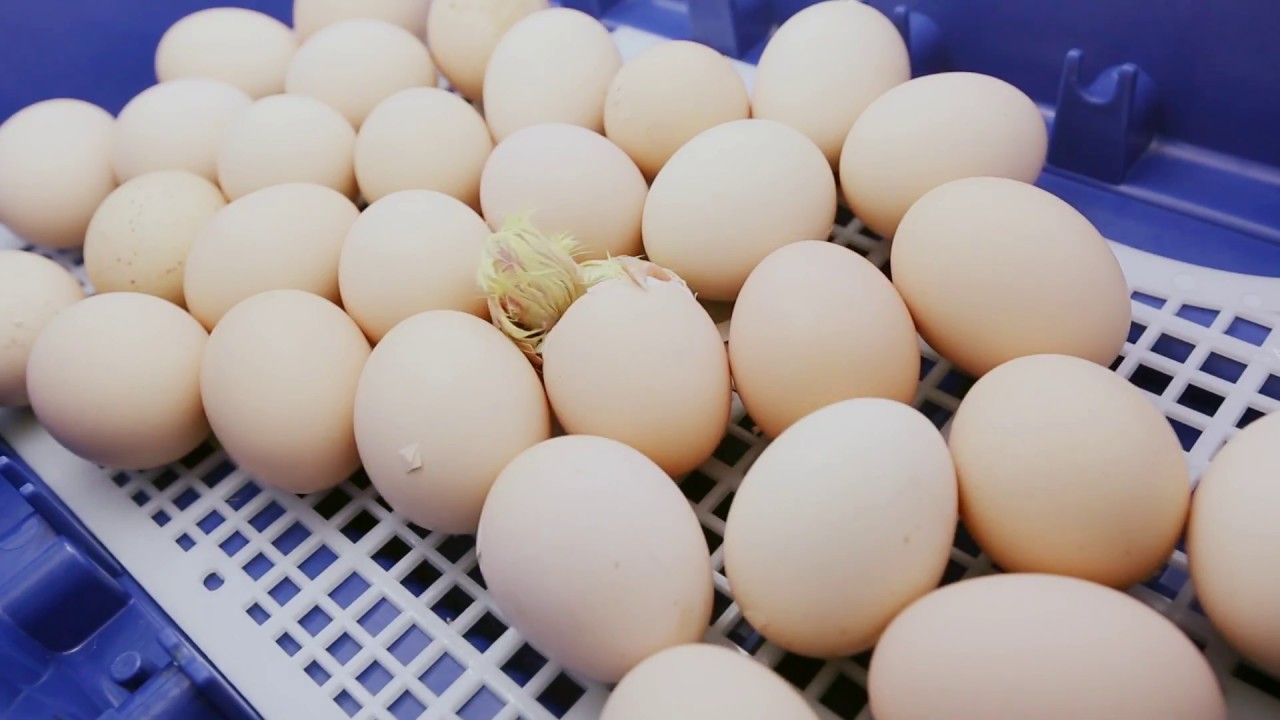
Hatching Day
On hatching day, patience is key. It’s essential to avoid opening the incubator unnecessarily, as this can disrupt the humidity and temperature levels. Allow the chicks to hatch naturally, and only intervene if absolutely necessary.
Caring for Newborn Chicks
Once the chicks have hatched, transfer them to a brooder with a heat source, such as a heat lamp. Provide fresh water and chick starter feed to ensure they receive the nutrients needed for healthy growth. For more on caring for chicks, see how to give herbs to chicks safely.
Common Challenges and Solutions
Egg incubation can present challenges, such as improper temperature or humidity, resulting in failed hatches. Regular monitoring and adjustments can mitigate these issues. Additionally, understanding the signs of potential problems, such as cracked eggs or delayed hatching, can help address them promptly.
Learning from Experience
Each incubation cycle is a learning opportunity. Keep detailed records of your settings and outcomes to identify patterns and improve future hatches. Over time, you’ll refine your techniques and achieve greater success.
Resources for Further Learning
For more in-depth information on egg incubation, consider exploring resources like the egg incubator setup video. These resources provide expert tips and insights to enhance your incubation skills.
Conclusion
Embarking on your egg incubation journey is an exciting and rewarding experience. By following the guidelines in this beginners guide to egg incubation, you’ll be well-prepared to hatch healthy and vibrant chicks. Remember, practice and patience are key to mastering the art of incubation.
FAQ
Q: What is the ideal temperature for incubating chicken eggs?
A: The ideal temperature for incubating chicken eggs is approximately 99.5F (37.5C).
Q: How often should eggs be turned during incubation?
A: Eggs should be turned at least three to five times a day until the lockdown period.
Q: Can all eggs be incubated?
A: No, only fertilized eggs from healthy hens should be incubated for successful hatching.
This article contains affiliate links. We may earn a commission at no extra cost to you.


