
Setting up an incubator in small spaces can be a challenging yet rewarding endeavor for chicken lovers. Whether you’re an urban dweller with limited space or someone new to egg incubation, understanding how to set up an incubator in small spaces is essential for successful hatching. In this article, we’ll explore practical strategies and tips to make the most of your available space while ensuring optimal conditions for your eggs.
1. Understanding the Basics of Incubation
Before diving into the specifics of setting up an incubator, it’s important to understand the basics of incubation. Incubation is the process of maintaining eggs under controlled environmental conditions to ensure successful hatching. Temperature, humidity, and ventilation are crucial factors that influence the development of embryos.
2. Choosing the Right Incubator for Small Spaces
When working with limited space, selecting an incubator that fits your requirements is vital. Look for compact and portable incubators that don’t compromise on functionality. Consider models with adjustable settings to accommodate different types of eggs and ensure optimal hatching conditions.
2.1. Evaluating Incubator Size and Capacity
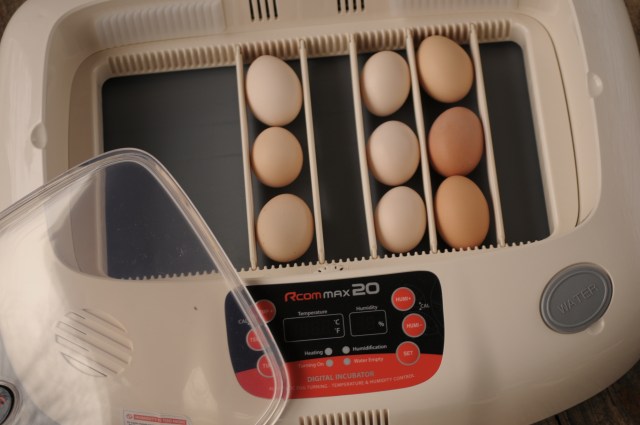
Assess the available space in your home to determine the appropriate size and capacity of your incubator. Smaller models with a capacity of 7 to 12 eggs are ideal for small spaces, allowing you to manage the incubation process without crowding your living area.
2.2. Features to Look for
When selecting an incubator, consider essential features such as automatic temperature and humidity controls, egg turning mechanisms, and digital displays. These features simplify the incubation process and increase the chances of successful hatching.
3. Preparing Your Space for the Incubator
Creating an optimal environment for your incubator is crucial. Choose a location away from direct sunlight, drafts, and temperature fluctuations. Ensure the area is clean and free from potential contaminants to maintain a healthy incubation environment.
3.1. Temperature and Humidity Control
Maintaining consistent temperature and humidity levels is essential for successful incubation. Use a thermometer and hygrometer to monitor these parameters and make adjustments as needed. For more tips on managing incubator humidity, visit egg incubator humidity hacks.
3.2. Ventilation and Airflow
Adequate ventilation is vital for providing fresh air to developing embryos. Ensure your incubator has proper airflow and avoid blocking vents. Regularly check and clean the ventilation system to prevent dust buildup and maintain air quality.
4. Setting Up the Incubator
Once you’ve prepared your space, it’s time to set up the incubator. Follow these steps to ensure a smooth setup process:
4.1. Assembling the Incubator
Carefully read the manufacturer’s instructions to assemble your incubator correctly. Ensure all components are securely attached and functioning properly before placing eggs inside.
4.2. Calibrating Temperature and Humidity
Before adding eggs, calibrate the incubator’s temperature and humidity settings. Allow the incubator to run for several hours to stabilize the environment. For more information on troubleshooting incubator issues, refer to the chicken incubator troubleshooting guide.
5. Managing the Incubation Process
Managing the incubation process involves regular monitoring and adjustments to ensure optimal conditions for egg development.
5.1. Egg Turning
Egg turning is crucial to prevent the embryo from sticking to the shell. Most incubators have automatic turning mechanisms, but manual turning every few hours may be necessary for some models. Ensure eggs are turned at least three times a day for the first 18 days.
5.2. Monitoring Development
Regularly monitor the development of embryos using a process called candling. This involves shining a light through the egg to observe growth and detect any issues. For guidance on best practices for egg collection, visit egg collection best practices.
6. Preparing for Hatching
As the hatching date approaches, make necessary adjustments to the incubator environment to ensure a successful hatch.
6.1. Increasing Humidity
During the final days of incubation, increase humidity levels to aid the hatching process. This helps prevent the inner membranes of the egg from drying out and allows chicks to emerge more easily.
6.2. Creating a Safe Hatching Environment
Remove egg turning mechanisms and lay eggs flat on the incubator floor to allow chicks space to hatch. Ensure the incubator is clean and free from any obstructions that could hinder the hatching process.
7. Post-Hatch Care
Once chicks have hatched, provide proper care to ensure their health and well-being.
7.1. Transitioning to a Brooder
After hatching, transfer chicks to a brooder with a controlled environment. Maintain a warm temperature and provide fresh water and chick starter feed. Learn more about transporting eggs before incubation in this egg transport guide.
7.2. Monitoring Health and Development
Observe chicks regularly for signs of illness or distress. Ensure they have access to clean water, food, and a warm, draft-free environment to promote healthy growth.
FAQs
Q1: How much space do I need for an incubator?
A1: The space required depends on the incubator’s size and capacity. Compact models are suitable for small spaces, typically requiring a flat surface measuring around 1 to 2 square feet.
Q2: What is the ideal temperature for egg incubation?
A2: The ideal temperature for incubating chicken eggs is approximately 99.5F (37.5C). It’s important to maintain a consistent temperature throughout the incubation period.
Q3: How do I increase humidity in the incubator?
A3: To increase humidity, add water to the incubator’s designated water channels and monitor with a hygrometer. Adjust as needed to maintain the recommended humidity level of around 50-55% during the incubation period and 65-70% during hatching.
Conclusion
Setting up an incubator in small spaces requires careful planning and attention to detail. By choosing the right incubator, preparing your space, and managing the incubation process effectively, you can achieve successful hatching results. For additional resources and expert advice, consider exploring external sources like Dalton Supplies and Stromberg’s Chickens. Happy hatching!
This article contains affiliate links. We may earn a commission at no extra cost to you.


