Raising baby chicks is an exciting venture for chicken enthusiasts. It is crucial to provide a safe and warm environment for your little feathered friends. One effective and cost-efficient way to do this is by creating a DIY plastic tote chick brooder. This article will guide you through the process, ensuring your chicks are comfortable and healthy.

What is a Chick Brooder?
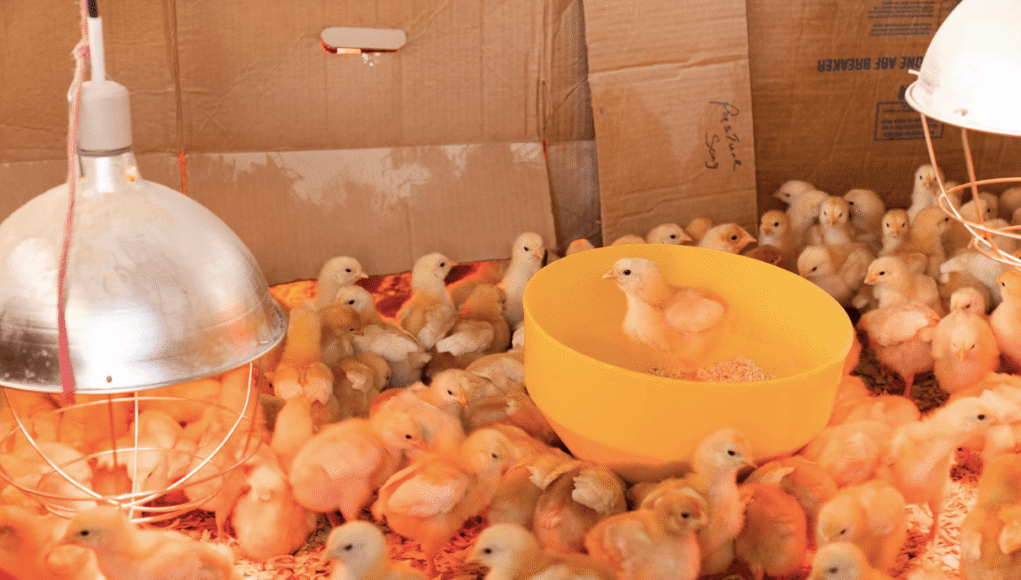
A chick brooder is a heated enclosure that mimics the warmth and safety of a mother hen. It’s essential for keeping your chicks at the correct temperature during their first few weeks of life. A plastic tote can serve as an excellent base for a brooder, as it is easy to clean and maintain.
Why Choose a Plastic Tote for Your Brooder?
A plastic tote is a practical choice for a chick brooder due to its affordability, durability, and availability. These containers come in various sizes, allowing you to select one that suits the number of chicks you are rearing. Additionally, plastic is easy to sanitize, which helps prevent the spread of diseases.
Materials Needed for a DIY Plastic Tote Chick Brooder
- Large plastic tote with a lid
- Heat lamp or brooder heater
- Thermometer
- Bedding material (pine shavings or paper towels)
- Chick feeder and waterer
- Wire mesh
- Scissors or utility knife
Step-by-Step Guide to Creating a DIY Plastic Tote Chick Brooder
Step 1: Prepare the Plastic Tote
Start by selecting a plastic tote that is large enough to accommodate your chicks comfortably. Cut a section of the lid to attach the wire mesh, which provides ventilation and prevents the chicks from escaping.
Step 2: Set Up the Heat Source
Position the heat lamp or brooder heater above the tote. A thermometer should be placed inside to monitor the temperature, ensuring it remains between 95-100F during the first week. Gradually decrease the temperature by 5F each week.
Step 3: Add Bedding
Line the bottom of the tote with bedding material. Pine shavings are preferred due to their absorbency, but paper towels can also be used for the first few days to help chicks find their footing.
Step 4: Install Feeder and Waterer
Place the chick feeder and waterer inside the brooder, ensuring they are easily accessible but not directly under the heat source. This setup helps maintain a clean and dry environment.
Maintaining Your DIY Plastic Tote Chick Brooder
Regular maintenance is essential to keep your chicks healthy. Replace bedding frequently, clean the feeder and waterer daily, and adjust the heat source as needed. For more comprehensive guidelines, you can refer to this Chick Brooder Maintenance Schedule.
Health and Safety Tips
Ensure the brooder is placed in a draft-free area and check the chicks regularly for signs of distress. Proper hygiene is vital, so consider reading about disinfecting chick brooders to prevent illnesses.
Transitioning Chicks from the Brooder
As your chicks grow, they will need to transition to a coop. Monitor their feather development and behavior, moving them when they can regulate their own body temperature. Learn more about the process through the Michigan State University Extension.
Additional Tips for Success
Provide your chicks with grit once they start consuming anything other than starter feed. This helps in digestion and can be introduced as early as two weeks. For more information, check out this grit introduction guide.
Conclusion
Building a DIY plastic tote chick brooder is a rewarding project that ensures your chicks have a warm, safe, and nurturing environment. With careful attention and regular maintenance, your chicks will thrive and grow into healthy chickens, ready to join your flock.

FAQs
Can I use a cardboard box instead of a plastic tote?
While cardboard boxes can be used temporarily, they are not as durable or easy to clean as plastic totes. Plastic totes offer better protection and longevity.
How often should I clean the brooder?
Cleaning frequency depends on the number of chicks and bedding used. Generally, it’s advisable to clean at least once a week and spot-clean daily. Learn more about cleaning techniques here.
What should I do if my chicks seem too cold or too hot?
Adjust the heat source accordingly. If chicks huddle under the lamp, they may be cold; if they avoid it, they may be too hot. Use a thermometer to ensure the correct temperature.
This article contains affiliate links. We may earn a commission at no extra cost to you.


