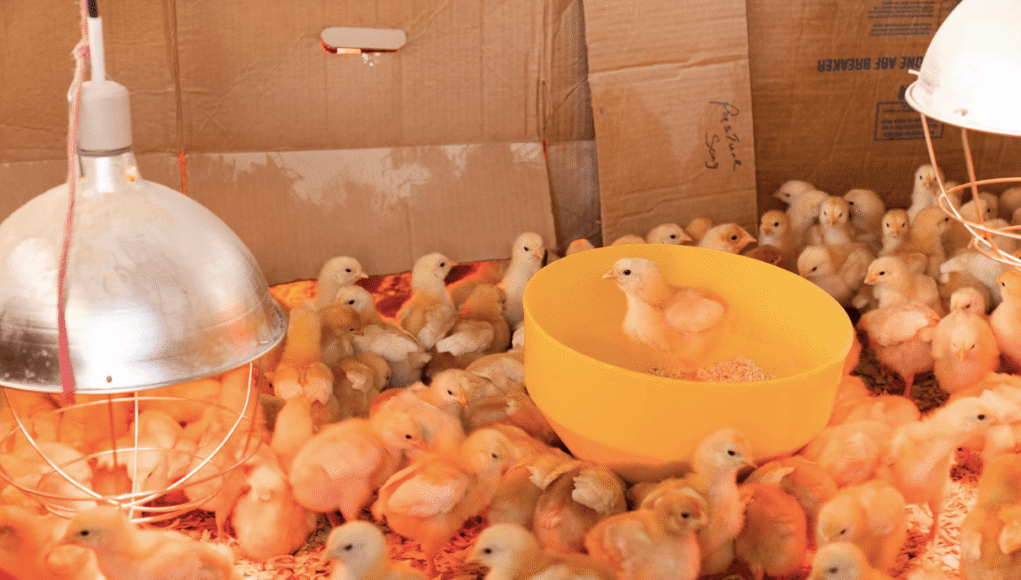
Raising chicks is a delightful experience, but it requires some preparation to ensure the little ones are safe, warm, and comfortable. One innovative way to create a nurturing environment is by using a chick brooder with old furniture. This approach not only recycles unused items but also provides a cozy space for your chicks. In this guide, we will explore how to transform your old furniture into a functional brooder.

Why Choose Old Furniture for a Chick Brooder?
Using old furniture for a chick brooder is an eco-friendly choice. It allows you to repurpose items that might otherwise go to waste. Moreover, old furniture pieces are often sturdy and can be easily adapted to serve as a protective and warm space for your chicks. This approach also adds a unique aesthetic to your backyard or farm.
Benefits of a DIY Chick Brooder
Creating a DIY chick brooder using old furniture has several benefits:
- Cost-effective: Repurposing furniture saves money on purchasing new brooding equipment.
- Customizable: You can tailor the design to fit your specific needs and space.
- Environmentally friendly: Reduces waste and promotes sustainable living.
Choosing the Right Furniture
Not all furniture is suitable for converting into a chick brooder. Here are some tips on selecting the right piece:
Consider the Size
The furniture should be large enough to accommodate the number of chicks you plan to raise. A dresser, cabinet, or even a large drawer can be excellent choices.
Material Matters
Choose furniture made from non-toxic materials. Wood is often the best option, as it provides good insulation and is easy to modify.
Steps to Convert Furniture into a Brooder
Now that you have chosen your furniture, let’s dive into the steps to convert it into a chick brooder.
Step 1: Clean the Furniture
Thoroughly clean the furniture to remove any dirt, dust, or potential contaminants. For more tips on cleaning, check out cleaning a chick brooder.
Step 2: Create Ventilation
Drill holes or cut out sections to ensure proper airflow. Ventilation is crucial to prevent overheating and maintain fresh air circulation.
Step 3: Add Bedding
Line the bottom with bedding materials such as straw, pine shavings, or paper towels. This provides comfort and helps with waste absorption.
Step 4: Install Heat Source
Chicks need warmth, especially in their early days. Install a heat lamp or a heating pad to maintain a temperature of about 95F (35C). Adjust the heat as the chicks grow. Learn more about setting up a brooder here.
Step 5: Set Up Feeding and Water Stations
Ensure there are designated areas for food and water. These should be easily accessible but placed to prevent spillage and contamination. For tips on keeping feed dry, visit keep feed dry.
Maintaining Your Chick Brooder
Regular maintenance is vital to keep the brooder clean and hygienic.
Daily Checks
Inspect the brooder daily to ensure the chicks are healthy, the bedding is clean, and the heat source is functioning correctly.
Weekly Cleaning
Perform a thorough cleaning at least once a week. Replace bedding, sanitize feeding and water stations, and check for any necessary repairs. For a detailed cleaning schedule, refer to maintenance schedule.
Common Challenges and Solutions
Using old furniture as a brooder can pose some challenges. Here are common issues and how to solve them:
Problem: Insufficient Heat
If the brooder isn’t maintaining the required temperature, consider adding an additional heat source or insulating the furniture better.
Problem: Overcrowding
Ensure the brooder is spacious enough as the chicks grow. You may need to expand the space or prepare a secondary brooder.
Conclusion
Creating a chick brooder with old furniture is a rewarding project that benefits both your wallet and the environment. By following these steps, you can ensure your chicks have a warm, safe, and cozy home. Not only does this method promote sustainability, but it also adds a personal touch to your chicken-raising experience.

Frequently Asked Questions
What types of furniture can be used for a brooder?
Dressers, cabinets, and large drawers made of non-toxic materials are ideal choices.
How often should the brooder be cleaned?
Perform daily checks and a thorough cleaning at least once a week.
How can I ensure proper ventilation in the brooder?
Drill holes or cut sections in the furniture to allow for adequate airflow.
This article contains affiliate links. We may earn a commission at no extra cost to you.


