Creating the best environment for incubator placement is crucial for successful egg hatching. Whether you are a seasoned poultry farmer or a hobbyist, understanding the ideal conditions can make a significant difference in your hatch rate. This guide will explore what makes the best environment for incubator placement and provide insights to help you optimize your setup.
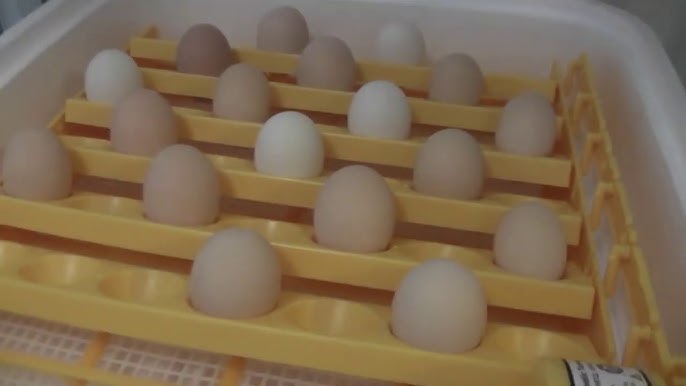
Importance of Incubator Placement
The placement of an incubator is not just about convenience; it directly influences the success of the incubation process. Proper placement ensures that the eggs receive consistent temperature and humidity levels, which are critical for embryo development. The location should be free from extreme temperature fluctuations and drafts, ensuring a stable and controlled environment.
Temperature Control
Why Temperature Consistency Matters
Maintaining a consistent temperature is vital. Fluctuations can lead to poor hatch rates and even embryo mortality. The ideal temperature for most chicken eggs is around 99.5F (37.5C). It is essential to monitor the temperature regularly and adjust as necessary to maintain consistency.
Optimal Room Temperature
The room where the incubator is placed should ideally be between 70F and 77F (21C to 25C). This range helps in maintaining the internal temperature of the incubator without overworking the heating element.
Humidity Levels
Role of Humidity in Egg Incubation
Humidity is another critical factor in the incubation process. It affects the rate of moisture loss from the eggs, which is crucial for the chick’s development. Insufficient humidity can cause the egg to lose too much moisture, while excessive humidity can prevent the chick from absorbing the yolk properly.
Maintaining Optimal Humidity
For most chicken eggs, the ideal humidity level is around 50-55% during the initial 18 days and should be increased to 65-70% during the last few days before hatching. For more detailed guidelines, check out this humidity guide.
Ventilation and Air Quality
Significance of Proper Ventilation
Proper ventilation ensures that the eggs receive enough oxygen and that carbon dioxide can escape. It’s essential to have an incubator with adjustable vents to manage air circulation effectively.
Ensuring Clean Air
Place the incubator in an area with clean air, free from dust, smoke, and pollutants. Regular cleaning and maintenance of the incubator also help in preventing bacterial growth and ensuring a healthy hatching environment.
Lighting Conditions
Impact of Light on Incubation
While light does not directly affect the incubation process, it is beneficial for monitoring and managing the incubation. A well-lit area can help you observe the eggs and the incubator’s controls more clearly.
Choosing the Right Lighting
Ensure the lighting is sufficient but not too harsh. Natural light is ideal, but if artificial lighting is used, it should be soft and not generate additional heat.
Minimizing Vibrations and Disturbances
Why Stability Matters
Vibrations and disturbances can negatively impact the incubation process. They can cause the embryos to become disoriented or damaged.
Choosing a Stable Surface
Place the incubator on a stable, vibration-free surface, away from high-traffic areas. Avoid placing it near machinery or appliances that create vibrations.
Accessibility and Monitoring
Importance of Easy Access
Easy access to the incubator is vital for regular monitoring and adjustments. The placement should allow you to check the temperature, humidity, and egg condition without hassle.
Monitoring Tools
Utilize tools like thermometers and hygrometers to keep track of the environmental conditions. Consider setting up a schedule for candling the eggs to check for embryo development.
Safety Considerations
Electrical Safety
Ensure that the incubator is plugged into a safe electrical outlet. Avoid using extension cords if possible, and regularly check for any signs of electrical faults.
Fire Safety
Keep the incubator away from flammable materials and ensure that it is in a well-ventilated area to prevent overheating.
Learning from Others
There’s a wealth of information available from experienced chicken farmers and hobbyists. Engaging with the community can provide valuable insights. For a visual guide, consider watching this setup video that covers essential tips.
Dealing with Challenges
Common Problems
Some common issues include temperature fluctuations, humidity imbalances, and power outages. Preparing for these challenges can help in mitigating potential problems.
Solutions and Tips
Invest in a reliable power backup system and regularly calibrate your incubator settings. For more tips on preparing your eggs, visit this egg storage guide.
Conclusion
Setting up the best environment for incubator placement involves careful consideration of several factors, including temperature, humidity, and air quality. By paying attention to these elements, you can significantly improve your hatch rates and ensure a successful incubation process. For further reading, check out this beginner’s guide to egg incubation.
FAQ
What is the ideal temperature for incubating chicken eggs?
The ideal temperature for incubating chicken eggs is around 99.5F (37.5C).
How can I maintain the right humidity level in my incubator?
Use a hygrometer to monitor humidity levels. Adjust the water trays or add a damp sponge to increase humidity.
Why is my hatch rate low?
Low hatch rates can result from temperature fluctuations, incorrect humidity levels, or poor egg quality. Ensure you are following best practices for incubation.
This article contains affiliate links. We may earn a commission at no extra cost to you.
